

BMCU Firmware Flashing Tutorial
This article applies to all mainboards as of May 26, 2025 (including early versions, Hall-effect sensor mainboards, and various Type-C mainboards)
What You'll Need
- BMCU mainboard
- CH340 serial module
- Dupont wires
- Computer
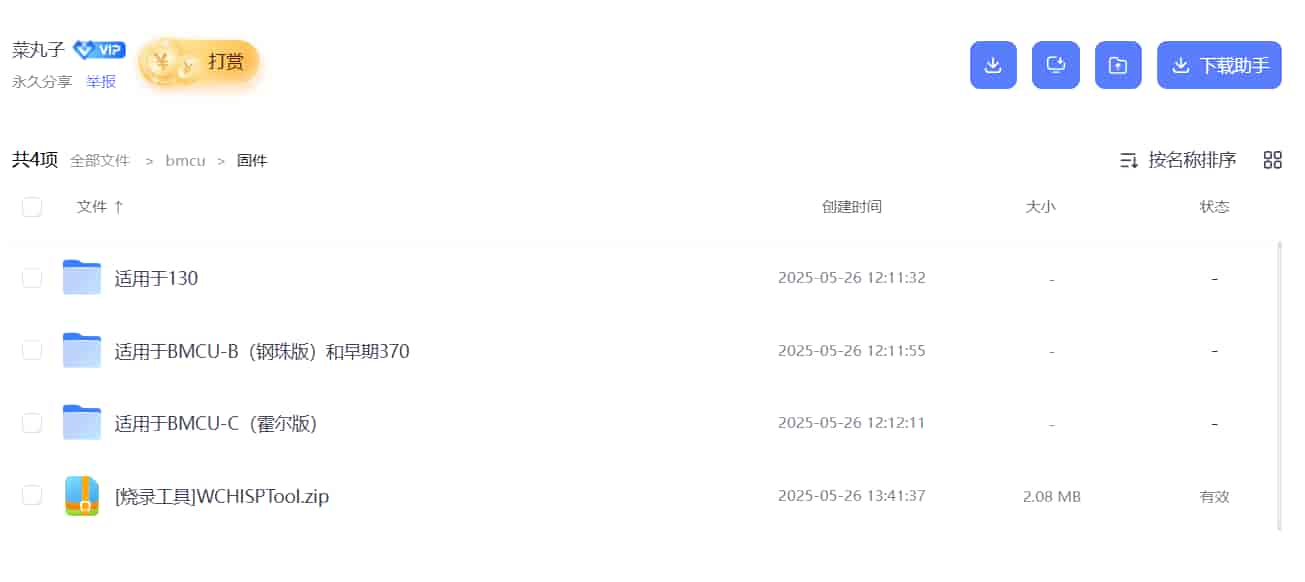
Please visit the Download Center to download the required firmware bin file and flashing tool.
Firmware Flashing Steps
WARNING
Before proceeding, use a multimeter to check for shorts between 3.3V and GND, and between 24V and GND. If shorts exist, it may damage your serial module. If your computer lacks USB surge protection, the USB port may also be damaged.
Install Drivers
Visit WCH's official website to download and install the CH340 serial chip driver.
Connect Serial Module to BMCU Mainboard
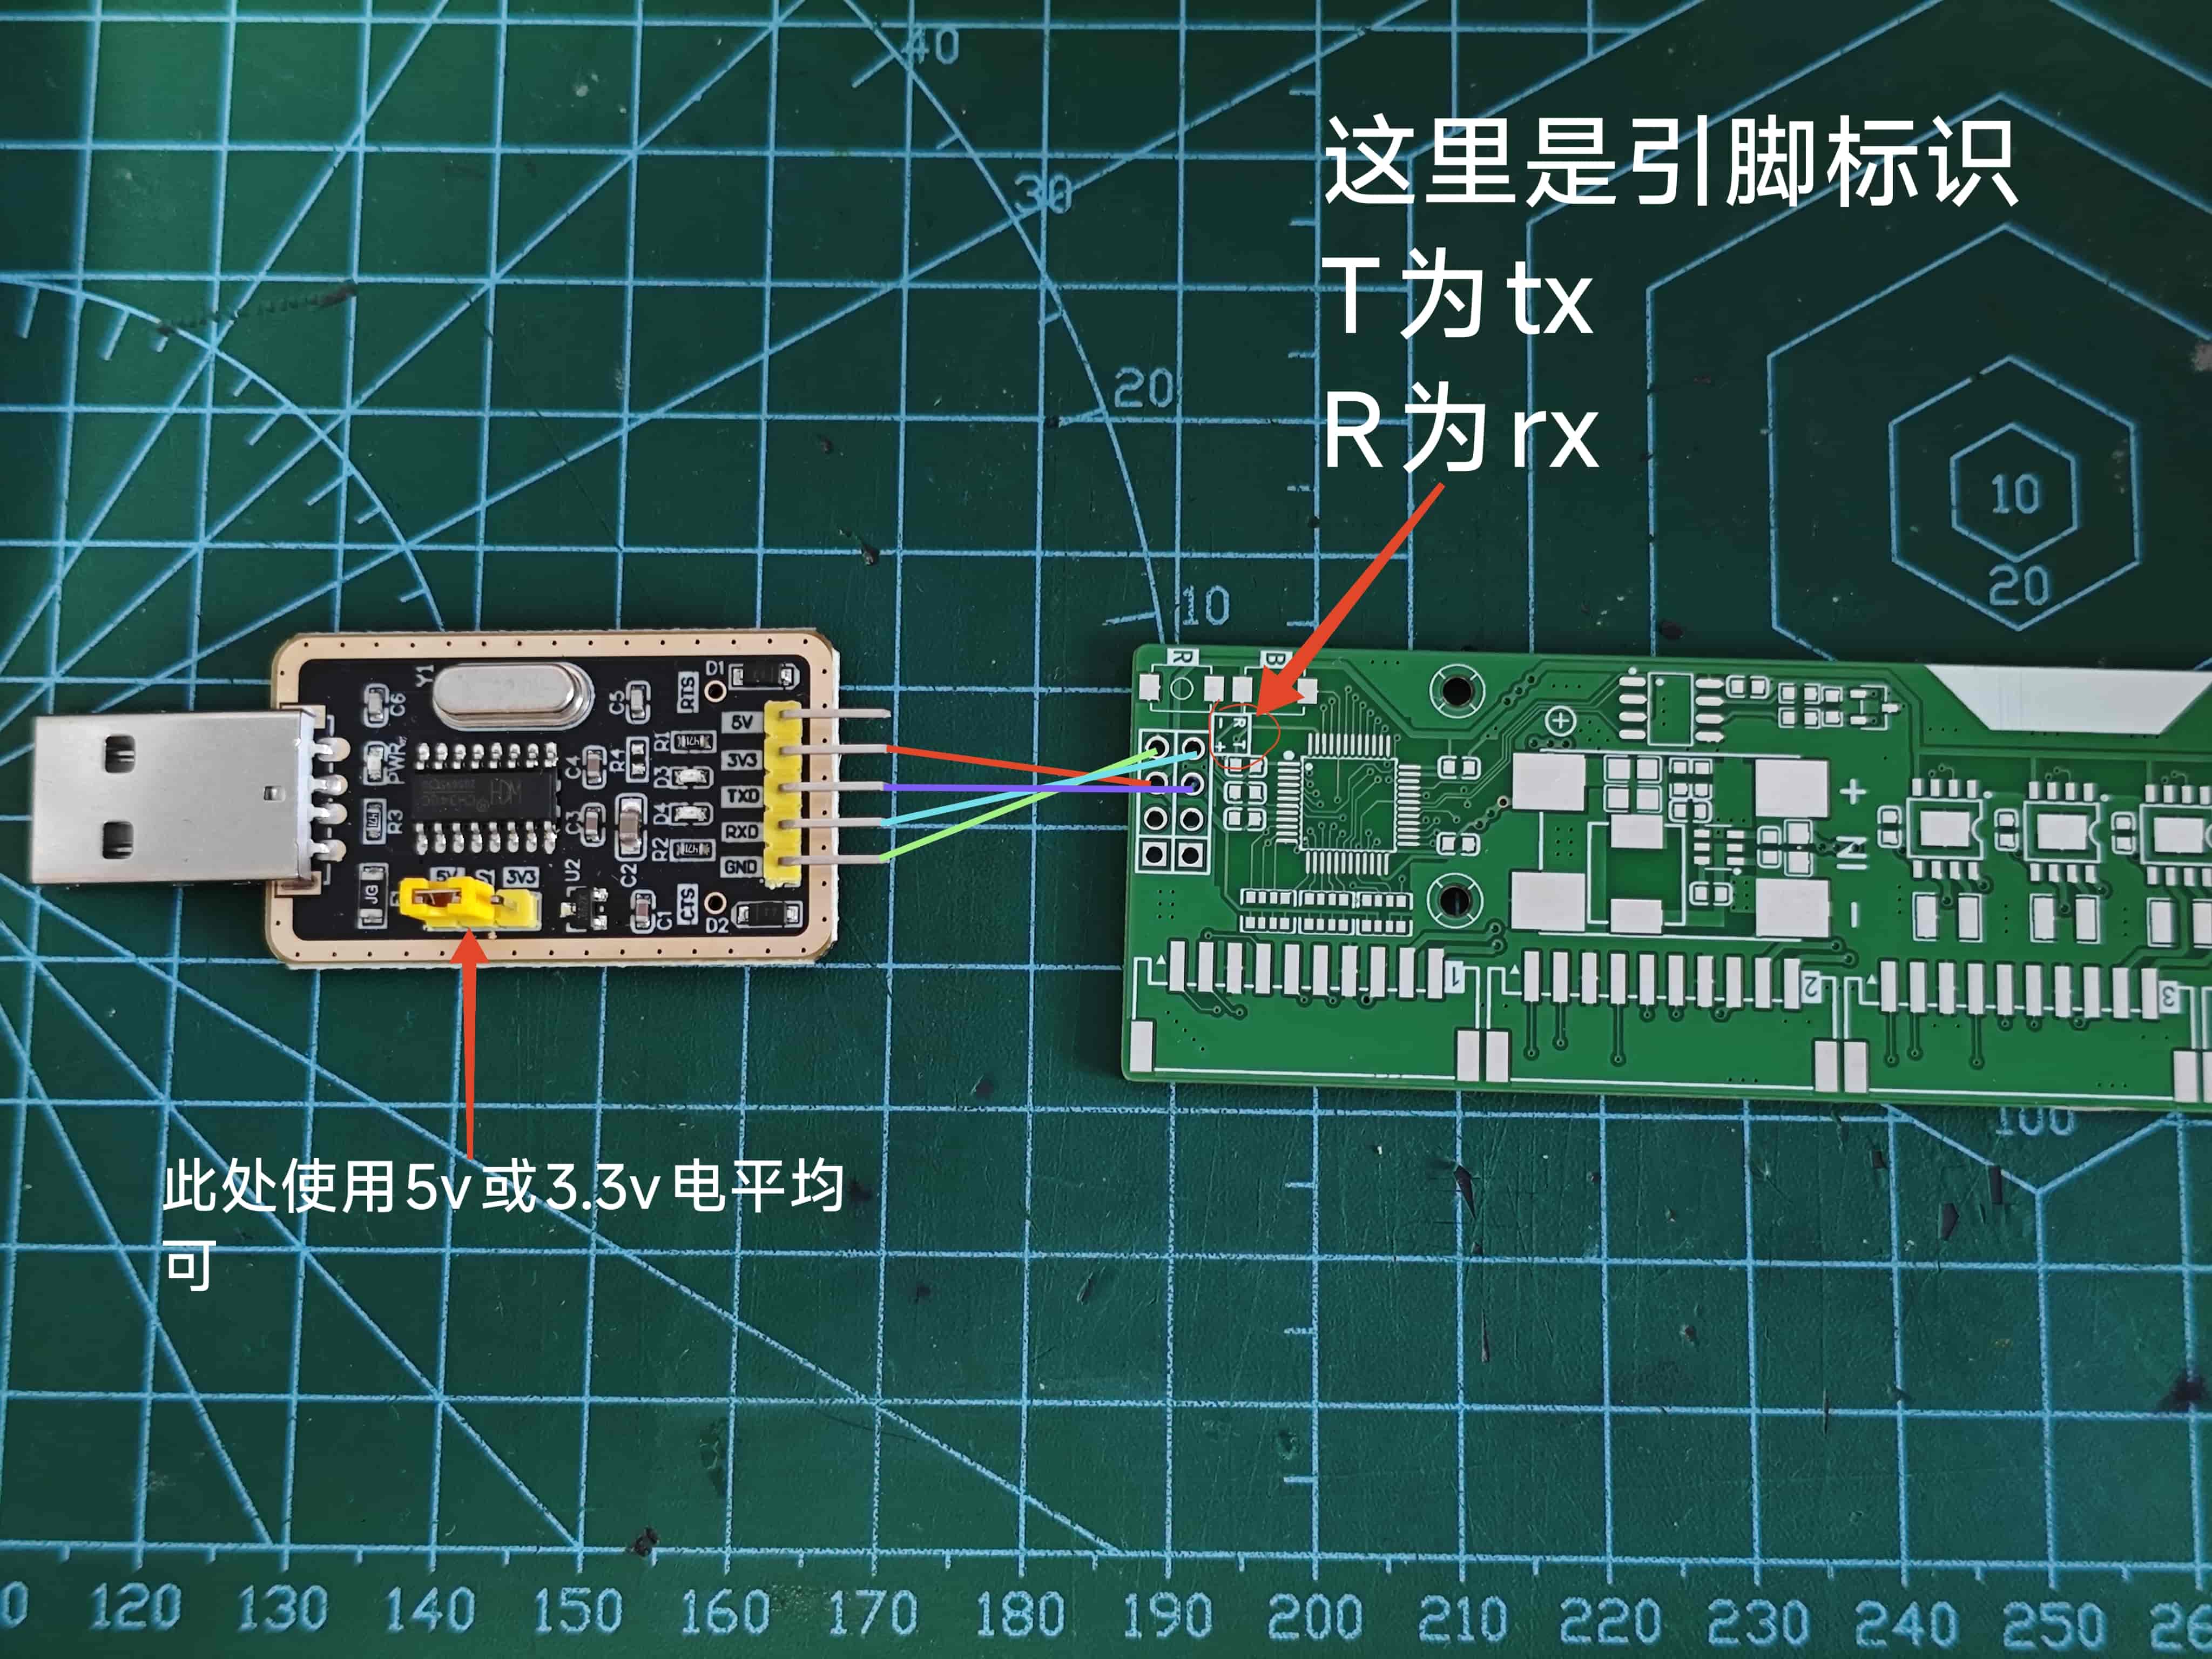
Connect using Dupont wires according to the following pinout:
| Mainboard | Module |
|---|---|
| V+ | 3.3v |
| GND | GND |
| TX | RX |
| RX | TX |
Verify Computer-Module Connection
Connect the programmer to your computer.
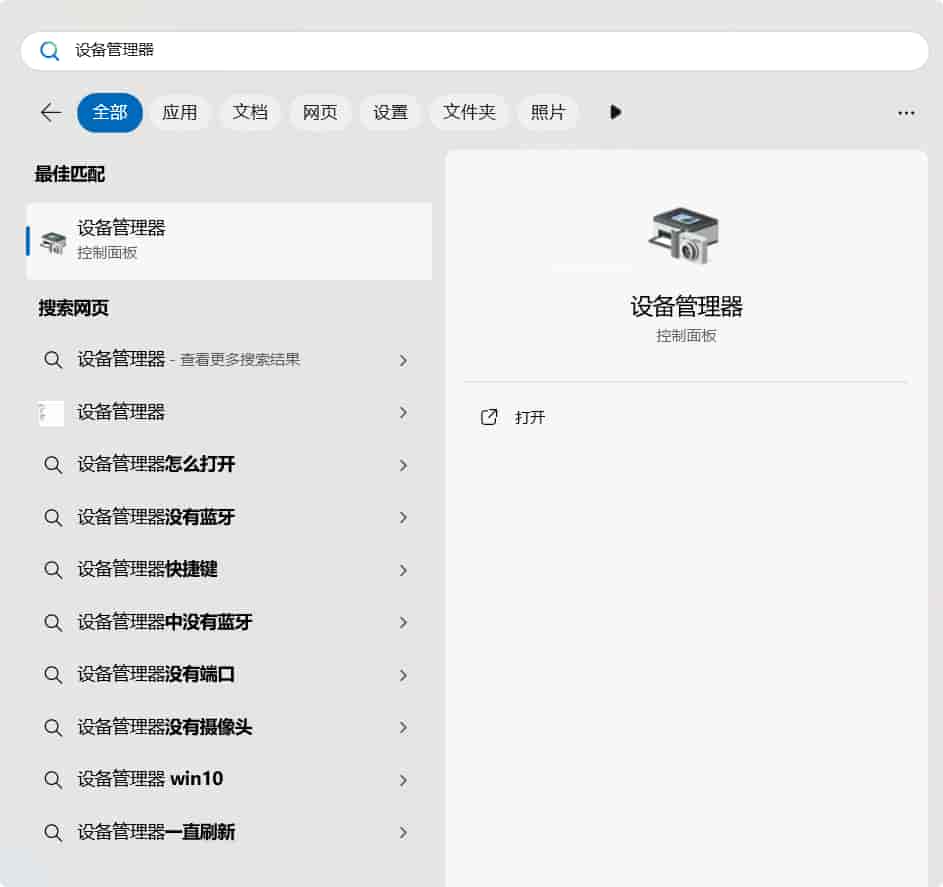
Search for and open "Device Manager" from the Start menu.
In Device Manager, expand Ports (COM & LPT).
You should see a device as shown:
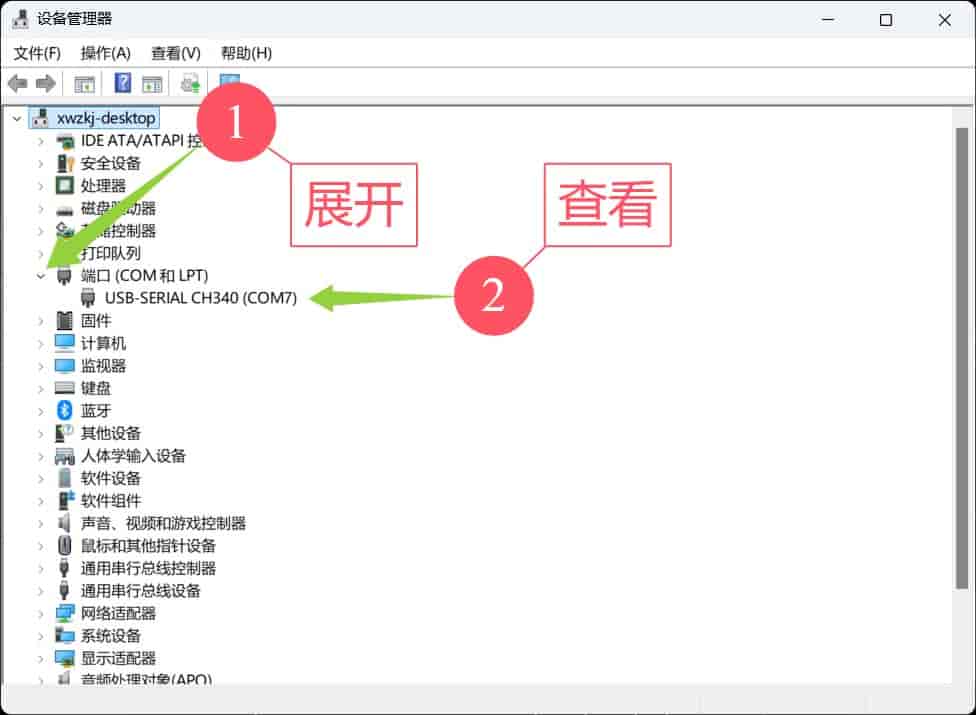
Note the port number (COM7 in the image).
If not found, check if the driver installed correctly.
Alternatively, there may be soldering issues with your mainboard. Immediately disconnect the module from your computer to prevent overheating damage!
You can test the serial module alone without connecting the BMCU mainboard. If it works alone, the issue is with your mainboard's soldering.
Begin Flashing
Open the flashing tool:
- Select chip model as
CH32V203 - Click the search button
- Select the port number identified earlier
- Choose the firmware file
After this step, press and hold button
Bon the BMCU mainboard, then click buttonR. Do not release buttonBduring the process. - Click
Unprotect(skip if this is the first firmware flash for your chip)Should display
Read/Write protection removed successfully - Click
Download(D) - Wait for the progress bar at bottom right to complete, showing success

Verify Successful Flash
Release button B and click button R. After a short wait, if the mainboard's WS2812 LED lights up red, this indicates the firmware is running.